Nightbox

Goal
In this project I wanted to replace my daughter's night ligt / alarm clock with a nicer looking one that didn't lose time every time it was unplugged and would not empty 4 AA batteries every week.
A simple, easy project to get back to electronics!
Bill of materials
- A Raspberry Pi Pico
- 2 LEDs + resistors
- An DS3231 RTC clock module
- A plywood enclosure
Electronics
The Pico does not have an internal battery to keep the clock alive. Given that one of the objectives of the project was to have a kid-proof object that I wouldn't have to setup again and again, I added a real-time clock module which includes a battery.
This is the CircuitPython code to turn the LEDs on and off and read the clock:
import board
import time
import digitalio
import adafruit_ds3231
from busio import I2C

# Pinout
led_night = digitalio.DigitalInOut(board.GP28)
led_night.direction = digitalio.Direction.OUTPUT

led_day = digitalio.DigitalInOut(board.GP16)
led_day.direction = digitalio.Direction.OUTPUT

clock_scl = board.GP3
clock_sda = board.GP2

# Clock setup
i2c = I2C(clock_scl, clock_sda)
rtc = adafruit_ds3231.DS3231(i2c)

led_night.value = True
led_day.value = False

# Main loop
while True:
    led_night.value = not led_night.value
    led_day.value = not led_day.value
    time.sleep(1)
    t = rtc.datetime
    print(t.tm_hour, t.tm_min, t.tm_sec)
The full code is left as an exercise to the reader because the only copy I have is on the Pico itself...
Moving from a breadboard to a small circuit.


Building the enclosure
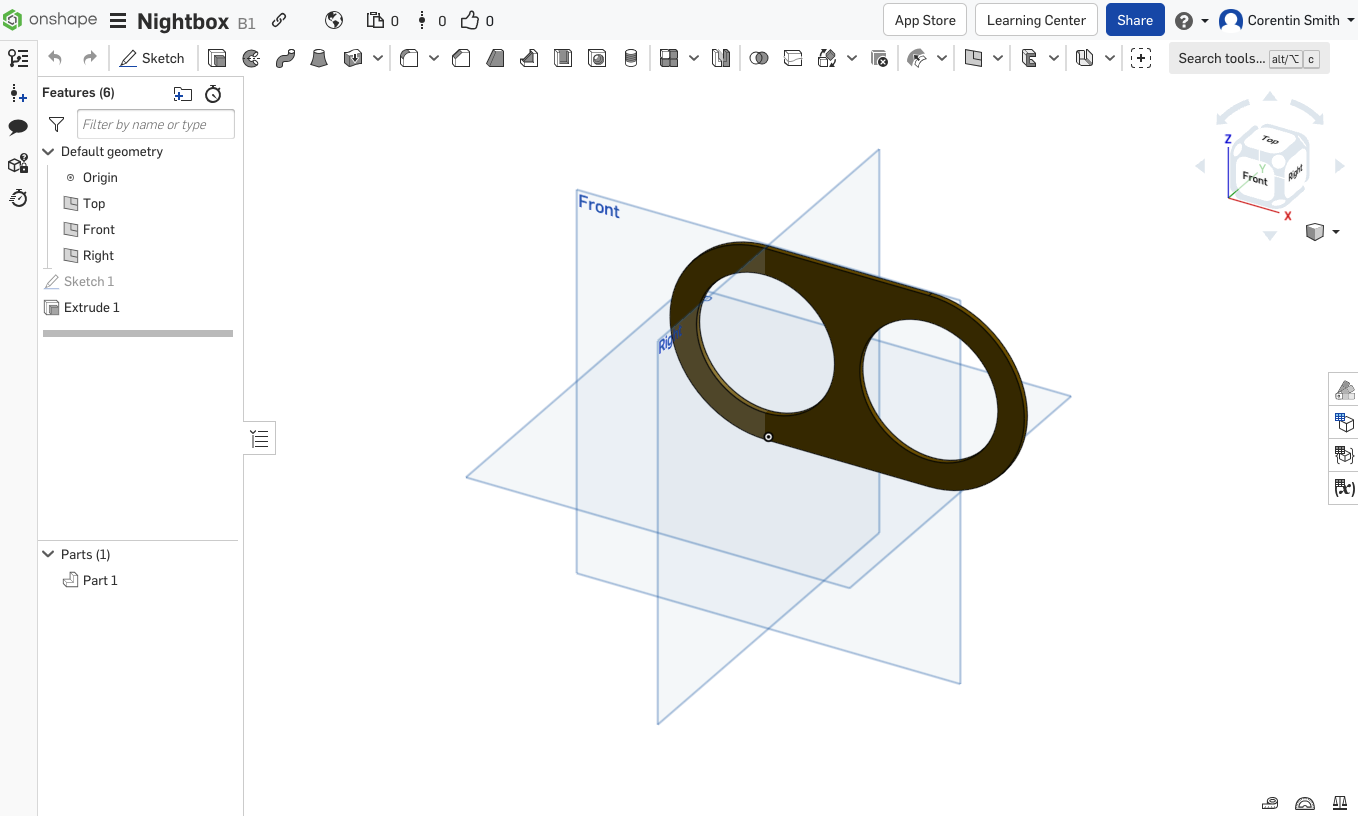
I used Figma and OnShape to design the enclosure. Figma is good to quickly visualize some ideas because I'm used to it, and I can create many copies of a 2d design and tweak it. OnShape is good to have a parametrized design that I can tweak once I have the basic shape in mind. You can find the CAD file here.

Who needs a CNC? A bandsaw and some double-sided tape is enough!


Windows
I had the idea to use shrink plastic ("crazy plastic" in french!) to get translucent backlit images.
First some sketches...

Then a pencil drawing

Then watching it warp in the oven and praying for the size ratio to be consistent over the whole sheet!

Small test with the circuit and the drawings... it works! But I hadn't anticipated the spill through the wood itself. Fixed with a bit of black tape inside.

Integration
At this point it's just a matter of making everything fit in the box.

I added some foam to diffuse the LED light better. It's quite close to the drawing itself so it was too focused in the center.

It works! It was a good project to start using the Pi Pico. I found it very satisfying to work at the intersection of design, programming, electronics and woodworking. Now I'm excited for my next project! And I can sleep a little longer every morning...